|
You can do pretty much what you like
with your result: signatures, websets, paper
Give Credits to Tchalange
http://tchasdesigns.com PSP 4 ALL
http://psp4all.com
I
work with PSP 2018
You can use a tube of your
choice, free or not, but credit for it must be added to your tag.
I used my AI tubes
DO NOT USE COPYRIGHT SYMBOL
you can find my tubes in
fotki
they are free
Public Home |
Tchalange | Fotki.com, photo and video sharing made easy.
Supplies
>
masks, tubes, decos, wordart <<< in material
 Material Material
Filters:
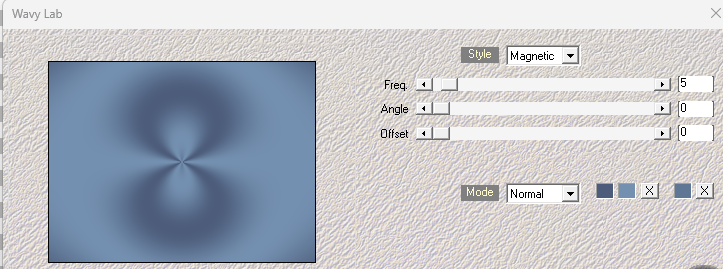
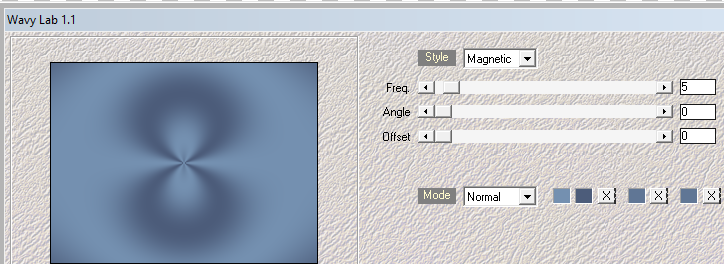
Mehdi<<< wavy lab ou la version wavy lab1.1
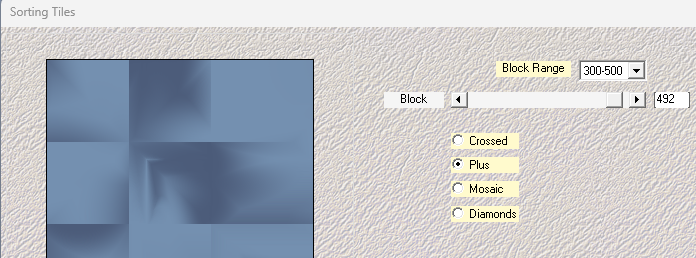
Mehdi <<< sorting tiles
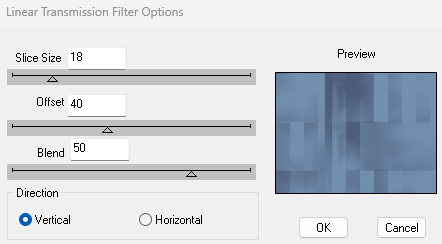
DBS Flux<<< linear transmission (vertical et horizontal)
penta.com<<< jeans
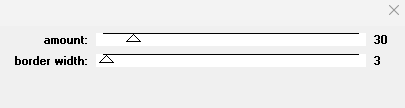
APlines << line-silverlining
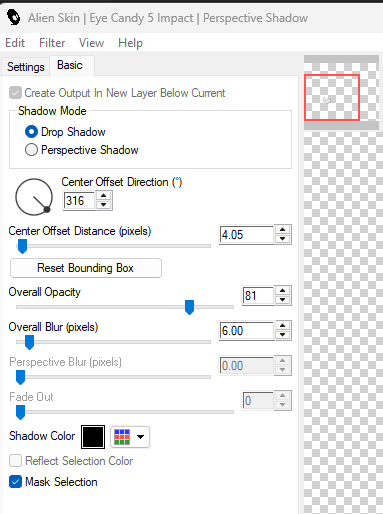
Eye candy <<gradiant glow
Eye candy 5<< perspective shadow
Police
:
Pixelette,
Bluejeans pour le wordart
For
members of PSP 4 ALL
Please join your tag as attachment (with the same background
for my results page), thanks !
***********
1
* Background
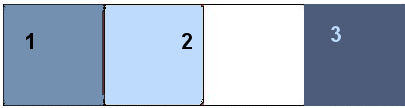
#7390b0 #bedbfd
#4d5c7b
open a new image 800x600
apply Mehdi<<< wavy lab ou la version wavy lab1.1
or
Apply Mehdi <<< sorting tiles
Apply DBS Flux<<< linear transmission
Apply
penta.com<<< jeans
redo DBS Flux this time Horizontal checked
redo penta.com 32/7
2 *
Masks
new layer
apply a gradient
made with colors 1
#7390b0 and
color white
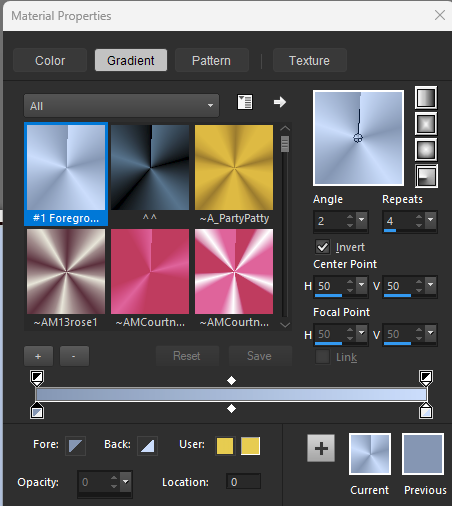
fill the layer with the gradient
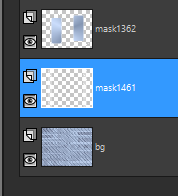
apply mask Narah-Mask 1362
add a layer, fill with white
apply the same mask
Narah-Mask 1362
put this layer under the firt mask layer
supprim the blue arrows
merge down
new layer
fill with whire
apply mask Narah-Mask 1461
3
* Sélections
open the mask layer 1362
download the selection 1
1) place an image of your tubes (paste, invert, supp)
opacity 38
blend
mode Luminance L
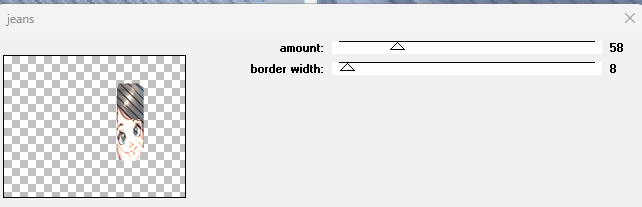
2) penta.com<<< jeans
3) keep selection
selection <<< modify<<< select selection borders
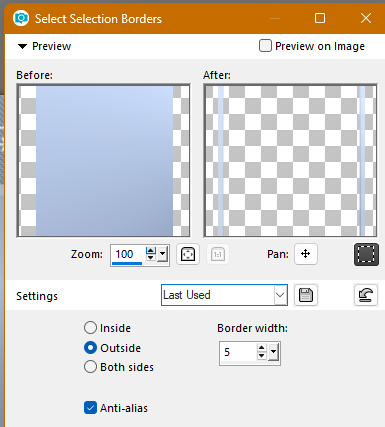
fill with white
load selection 2
repeat 1, 2 et 3
4 * Borders
Edition
>
Copy Special > Copy merged
Windows<< duplicate
Add borders -
Symmetric 2 - white
Add borders - Symmetric 5 - Colour
#4c5c7a col 3
Add borders symmetric 2 white
select all
Add borders - Symmetric 10 - white
Invert
Edition > paste into selection
Gaussian Blur - Radius 5
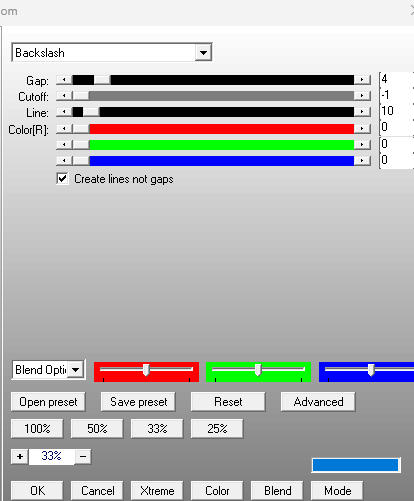
Apply APlines << line-silverlining
select none
Add borders - Symmetric 2 -white
select all
Add borders -
Symmetric 30 - white
Invert
Edition << paste into selection
gaussian blur - radius 20
Apply
APlines << silverline
select none
Add borders - Symmetric 2 - white
5*
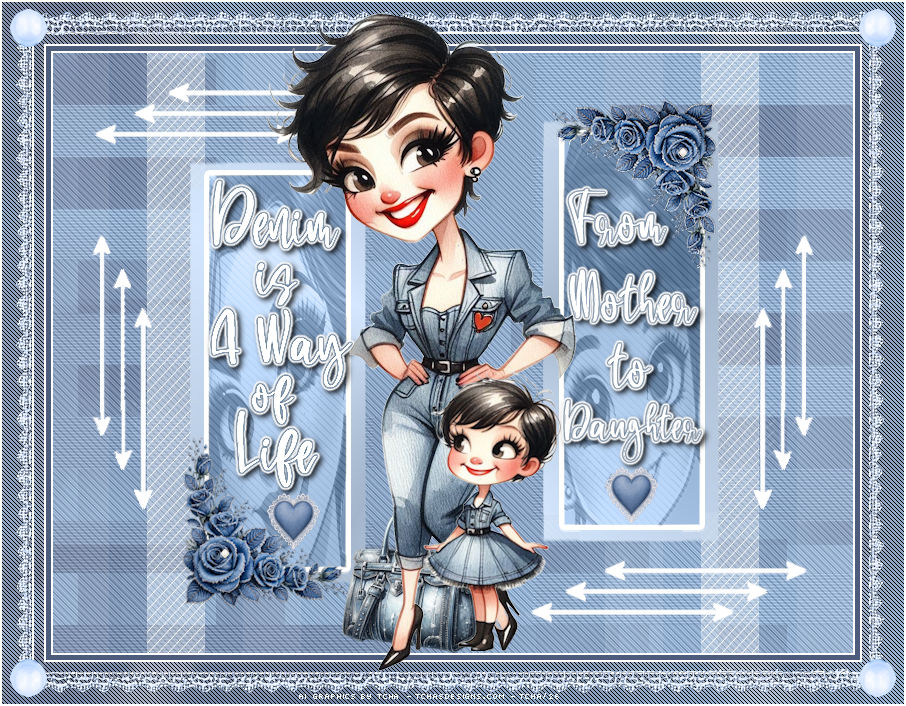
Elements + tube
+ deco in material
place after making the borders
You can
sharpen all the elements after resizing in adjust. Adjust >>>sharpness>>>unsharp
mask
(4/40/4).
tch@26_AICreations-denim_roses, 13%
place on the left blue square , duplicate
mirror H, duplicate
mirrorV
I draw a smaill white pearl in the heart of the roses
open the layer of the arrows, duplicate
paste on the left side, duplicate, mirror H
paste your tube
tch@26_AICreations-denim_bag , mirror, 15%
place next to your tube
6*wordart
mine if you want
tch@26_AICreations-wordartdenim, fichier PSD
place in the squares
apply a gradient glow (3, blue)
tch@26_AICreations-denim_hearts, 5%
under the wordarts
deco
open and paste on
tch@26_AICreations-denim_lace
bring to top
place on the tag
************************
Add your credits on your tag with a small font such as
pixelette in size 6 or 8, anti-aliasing disabled.
Save
your tag in jpg or PNG, don't forget to use the optimizer.
%20-%20IncrediMail%20Plus.png)
|